Window sill repair is essential for preventing significant damage caused by rot, a common yet often overlooked issue. Window rot repair is often performed during sash window restoration, as the window sills are most exposed to the weather.
Detecting and addressing window rot early can save you from more extensive repairs or even hight costs of window replacement.
In this guide, we’ll explore the subtle signs of window sill decay. We’ll also cover key assessment methods and repair techniques, helping you determine when minor fixes are sufficient and when a complete replacement is necessary.
Identifying and assessing window sill rot
Detecting window sill rot early is crucial for avoiding costly repairs or window replacement.
Like a skilled detective, you must learn to spot the subtle clues that indicate decay.
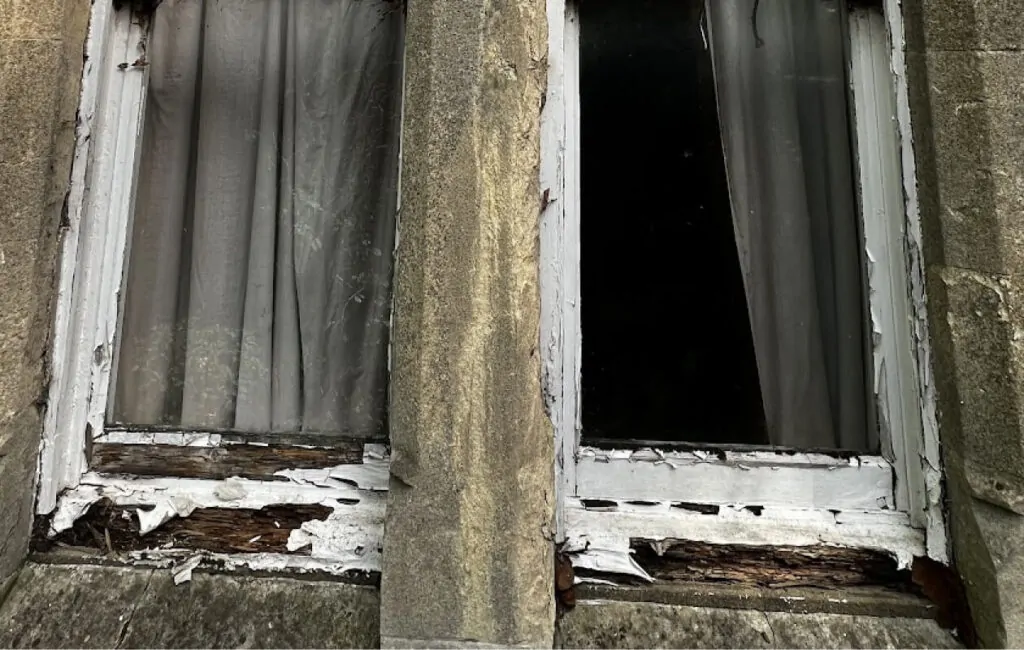
Let’s uncover the telltale signs and assessment methods that will help you determine whether your sill needs attention.
- Discoloration: Look for unusual darkening or lightening of the wood, often appearing as streaks or patches
- Texture changes: Feel for sponginess, brittleness, or a crumbly texture in the timber
- Paint peculiarities: Watch for bubbling, peeling, or flaking paint, which may indicate underlying moisture issues
- Moisture markers: Identify water stains, black spots, or a consistently damp feel, particularly after rainfall
- Fungal growth: Spot any mushroom-like growths, fine cotton-like filaments, or green algae on the wood surface
- Structural shifts: Check for warping, sagging, or gaps around the sill, often accompanied by sticking windows
- Odour observations: Sniff for musty, earthy smells near the window, which can indicate active fungal growth
- Visual inspection: Look for visible cracks, splits, or areas where the wood grain appears raised or separated
To assess the extent of rot, gently probe suspected areas with a screwdriver. If it sinks in easily or the wood crumbles, you’ve likely found decay.
For a more precise evaluation, use a moisture meter to measure wood dampness – readings above 20% indicate potential rot. In the UK, where damp weather is common, regular inspections are particularly important.
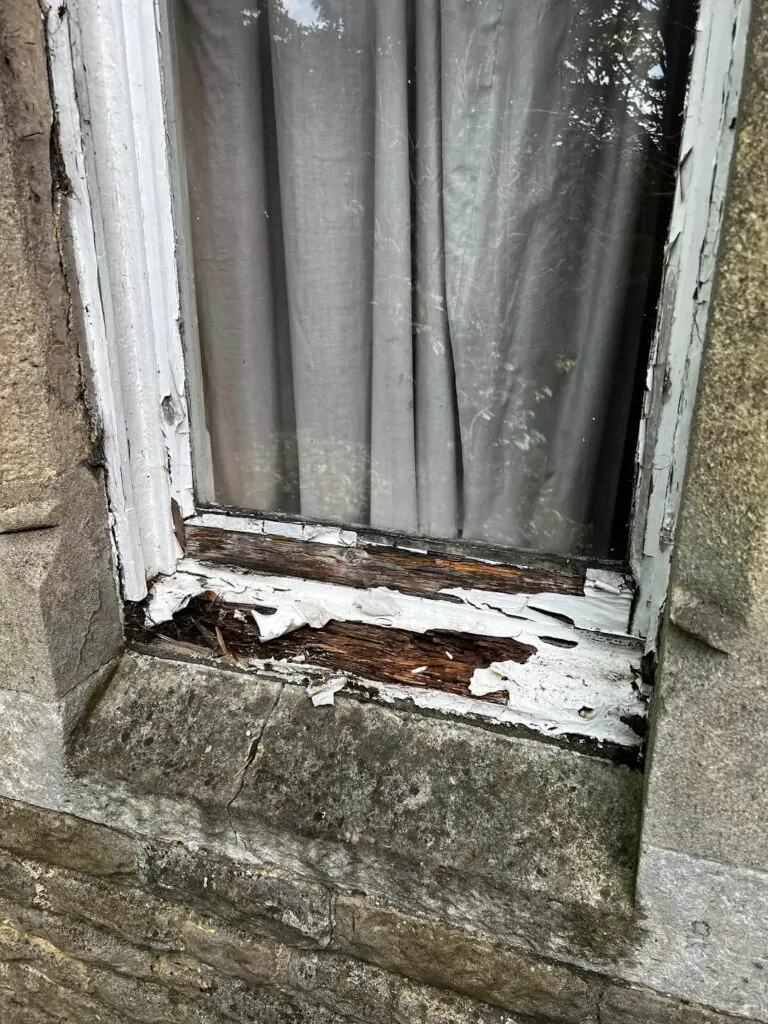
Our grading system, developed through years of experience in restoring sash windows across London and Bucks, helps determine the best course of action:
| Grade | Signs | Action | Repair Technique |
|---|---|---|---|
| 1 – Minor | Surface discoloration, slight softness | Repair | Epoxy filler |
| 2 – Moderate | Visible decay, up to 25% affected | Repair | Splice repair |
| 3 – Severe | Extensive rot, over 25% affected | Replace | Full sill replacement |
| 4 – Critical | Structural compromise, spreading to frame | Replace | Sill and partial frame replacement |
Remember, rot doesn’t always necessitate complete window sill replacement.
If you’ve eliminated the water source and the area can dry out, less invasive repairs may suffice.
However, addressing the root cause is paramount to prevent future issues. This might involve improving drainage, fixing leaky gutters, or applying water-resistant coatings.
Now that we’ve identified the rot, let’s explore the various techniques available to restore your exterior window sill to its former glory.
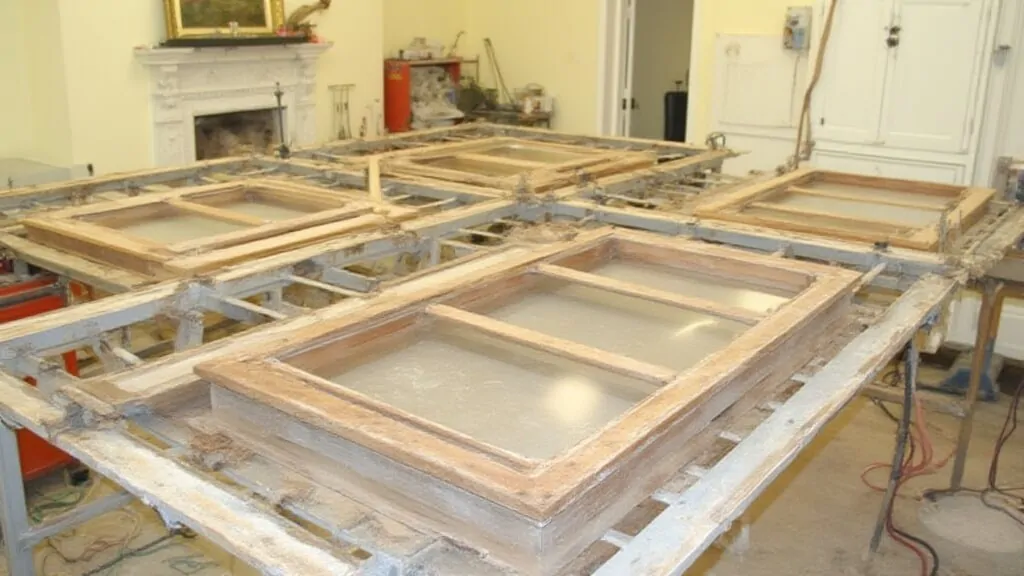
Rotten sill repair technics
When tackling a rotten window sill, homeowners can choose from several repair techniques, each suited to different levels of damage and longevity requirements.
Let’s explore three primary methods: splice repair, epoxy resin treatment, and complete replacement.
| Technique | Suitable for | Pros | Cons | Cost (£) |
|---|---|---|---|---|
| Splice Repair | Localised rot (25-50% damage) | Preserves original timber, cost-effective | Requires skilled carpentry | 100-200 |
| Epoxy Resin | Surface-level rot (<25% damage) | Quick, versatile application | May not address underlying issues | 50-100 |
| Full Replacement | Extensive rot (>50% damage) | Long-term solution, improves insulation | Higher cost, potential disruption | 200-300 |
Each technique requires specific tools and expertise.
While DIY enthusiasts might tackle epoxy treatments, splice repairs and replacements often benefit from professional craftsmanship to ensure proper water resistance and structural integrity. For extensive damage or structural issues, consider our professional window frame renovation services.
The choice ultimately depends on the extent of damage, budget constraints, and the property’s historical significance. For detailed pricing information on our restoration services, visit our pricing page.
With an understanding of the available repair techniques, let’s dive into the detailed process of splice repair, a popular method for addressing rotten window sills.
Splice repair of external wooden window sill
Splice repair, a cherished technique in the UK’s window restoration toolkit, revitalises rotten sills while preserving historical integrity. Ideal for addressing 25-50% damage, this method demands precision and skill.
Let’s explore the process using materials favoured by British craftsmen.
Essential tools and materials include chisels, a hand saw or oscillating multi-tool, wood plane, sandpaper (80-220 grit), waterproof PVA glue, clamps, Accoya or hardwood (e.g., oak, sapele), wood preservative, exterior filler, primer, and paint.
Follow these steps for a successful splice repair:
1. Assess damage and mark the removal area, cutting beyond visible rot.
2. Use a saw or multi-tool to remove the damaged section, chiselling out remaining rot.
3. Measure the void and cut a replacement piece, allowing for a snug fit.
4. Dry-fit and adjust the new piece for a perfect match.
5. Apply wood preservative to both existing sill and new piece.
6. Coat mating surfaces with waterproof PVA glue, leaving a 1-2mm gap for flexibility.
7. Clamp firmly and allow 24 hours to set.
8. Plane and sand the repaired area for a seamless finish.
9. Fill small gaps with exterior wood filler and sand smooth. 10. Prime and paint the entire sill for uniform protection.
While splice repair effectively addresses extensive damage, sometimes a less invasive approach is needed.
Let’s explore how epoxy resin can repair minor rot and restore your window sill.
Epoxy resin repair / wood filler repair
Epoxy resin repair offers a cost-effective solution for minor window sill rot, popular among DIYers and professional window restorers .
This method, using products like Dryflex, provides a durable fix without extensive carpentry skills.
Let’s explore the process, focusing on materials favoured in British DIY circles.
| Tools | Materials |
|---|---|
| Chisel, Sandpaper (60-220 grit), Putty knife, Mixing container, Protective gloves | Dryflex epoxy resin, Wood hardener, Wood filler, Primer, Exterior paint |
Epoxy filler window sill repair process
1. Clean the affected area by removing loose and decayed wood. Chisel out severely rotted sections for a stable base.
2. Apply wood hardener to strengthen remaining fibres, crucial in the damp UK climate.
3. Mix Dryflex epoxy resin as instructed. Its longer working time suits our unpredictable weather.
4. Apply epoxy in thin layers, building up gradually. This ‘feathering’ technique ensures seamless blending.
5. Once cured (4-6 hours), sand smooth, progressing from 60-grit to 220-grit.
6. For deeper repairs, apply wood filler over cured epoxy, matching the original sill profile.
7. After final sanding, prime and paint to match your window frame, using high-quality exterior paint.
While effective for surface-level damage, epoxy repairs aren’t a cure-all. For rot extending beyond 25% of the sill or into the frame, consider more extensive repairs like splice repair or replacement.
In cases where repair isn’t feasible, a full window sill replacement might be necessary. Let’s walk through the step-by-step process of replacing a rotten window sill.
Window sill replacement
Replacing a window sill is a transformative process that breathes new life into your period wooden windows and doors.
Let’s embark on this journey of restoration, blending traditional craftsmanship with modern techniques to create a durable, water-resistant sill that will stand the test of time in the UK’s challenging climate.
Before you begin, gather these essential tools and materials:
- Circular saw with a fine-toothed blade (minimum 40 teeth)
- Chisel set (including a 25mm and 38mm chisel) and rubber mallet
- Spirit level (600mm) and laser measure for precision
- Waterproof membrane (e.g., Flex Tape or DPC)
- Pressure-treated C16 grade timber for sub-sill
- High-quality exterior wood (e.g., Accoya, European oak, or sapele)
- Stainless steel exterior wood screws (50mm and 75mm)
- Wood preservative (e.g., Ronseal Total Wood Preserver) and exterior primer
- Exterior grade wood filler and flexible exterior caulk
- Dust mask, safety goggles, and work gloves
Now, let’s dive into the step-by-step process:
- Remove the old sill carefully, preserving surrounding trim if possible. Clean and assess the revealed area, addressing any hidden damage or dampness.
- Install a pressure-treated sub-sill to create a stable foundation. This crucial step enhances longevity and moisture resistance, particularly important in the UK’s damp climate.
- Apply a waterproof membrane over the sub-sill, extending it up the sides of the window frame by at least 150mm. This creates a secondary moisture barrier, essential for long-term protection.
- Measure for your new sill, allowing for a 15-degree slope and a 30mm overhang. This angle ensures proper water runoff, while the overhang prevents water from creeping up the underside.
- Cut your chosen timber to size, incorporating a 5mm deep drip groove on the underside, positioned 10mm from the front edge. This often-overlooked detail is vital for directing water away from the building.
- Before installation, treat all cut ends and the entire sill with wood preservative. Apply two coats, allowing proper drying time between applications to significantly extend the sill’s lifespan.
- Secure the new sill in place using 75mm stainless steel exterior wood screws, spaced every 300mm. Pre-drill 3mm pilot holes to prevent splitting, and countersink for a smooth finish.
- Fill screw holes with matching wood plugs or exterior filler for a seamless appearance and added moisture protection.
- Apply exterior filler to any gaps, ensuring a watertight seal around the entire sill. Once dry, sand smooth for a professional finish.
Pro tip: When cutting the sill, create a mock-up piece first from scrap timber to test the fit and angles. This extra step can save time and valuable materials in the long run.
Remember, the key to a long-lasting window sill lies in the details. Pay special attention to the joints where the sill meets the window frame, using high-quality exterior caulk to create a watertight seal. This prevents water ingress and potential future rot, a common issue in British homes.
With your new sill in place, proper sealing and finishing are crucial for long-term protection. Let’s explore the best practices for sealing and finishing your restored window sill.
Sealing and finishing the new sill
Sealing and finishing are the crowning touches in your window sill restoration, safeguarding against Britain’s fickle weather. A well-sealed sill not only enhances aesthetics but also forms a robust barrier against moisture, preventing future rot and extending longevity.
Maintaining your restored window sills
Maintaining your restored window sills is crucial for preserving their beauty and functionality.
Implement a bi-annual inspection routine, ideally in spring and autumn, to catch potential problems early.
During these checks, examine the sill’s surface integrity, feeling for roughness or soft spots that might indicate decay. Inspect the paint or finish for signs of cracking, peeling, or bubbling – telltale signs of moisture penetration.
Frequently asked questions about window sill repair
How long does a typical window sill repair take?
Window sill repair timelines vary by damage extent and method. Epoxy treatments typically take 2-3 hours, while full replacements may span 1-2 days.
Weather, material availability, and drying times influence duration. Always budget extra time for unforeseen challenges in restoration projects.
Can I repair a rotten window sill without replacing it entirely?
Minor to moderate rot can often be addressed without full replacement.
Epoxy treatments repair surface-level damage, while splice repairs tackle more extensive rot. These methods preserve original timber, saving time and money.
For severe decay affecting over 50% of the sill, replacement is typically the best long-term solution.
What type of wood is best for replacing a rotten window sill in the UK?
For UK window sills, Accoya excels with its durability and moisture resistance. European oak offers tradition, while sapele and iroko provide exotic options.
When selecting wood, consider both quality and cost. Let’s explore the financial aspects of professional window sill restoration in Britain.
How much does professional window sill repair cost in the UK?
Professional window sill repair costs in the UK range from £50 to £400 per sill, depending on the extent of the damage, the repair method, and the materials used.
The cost also varies based on whether the job is part of a larger window restoration project or a standalone service.
How often should I inspect my window sills for signs of rot?
Bi-annual inspections in spring and autumn are vital for UK homeowners. These seasons offer ideal conditions to spot rot early.
Can I prevent window sill rot in older homes?
Prevent window sill rot in older homes through regular inspections, proper sealing, and addressing drainage issues. Regularly painting windows is crucial to preventing window sill rot in older homes. Applying a high-quality exterior paint provides a protective barrier that shields wood from moisture, a leading cause of rot.
Is it necessary to repaint the entire window frame after repairing the sill?
Repainting the entire frame isn’t always necessary after sill repairs, but extending paint beyond the sill often achieves a seamless look. For older frames, a full repaint provides uniform protection. Consider paint condition, colour matching, and overall aesthetics when deciding your project’s scope.
What are the risks of ignoring a rotten window sill?
Neglecting a rotten window sill can lead to severe consequences. Beyond aesthetic concerns, it compromises structural integrity, potentially spreading to frames and walls. This deterioration affects insulation, increases energy costs, and may foster mould growth. Early intervention safeguards your property’s value and your family’s well-being, preventing costly escalations.

 Adam Brick
